Deploy Nuxt Static site to Cloudflare
You want to quickly show case your application to a friend, potential users or to launch a simple MVP out there but stuck up with multiple options of hosting platforms, pricing, domain name and endless of other relating components like SSL.
You are not alone, I navigate these hurdles every single time I want to put something out there and it takes a huge chunk of my development time.
In this article, I will show you how to deploy a static nuxt site to Cloudflare in less than 5 minutes. You can use any development stack or framework but here I will be using Nuxt.
Prerequisite will be Git(hub), Nuxt and access to Cloudflare.
First, you need to create a new nuxt project. You can do this in your terminal by running the following command:
npm create nuxt demo-app
Follow the prompt to create the project. Once the project is created, navigate to the project directory:
cd demo-app
Next, you would need to commit and push your changes to Github where it will be linked directly to cloudflare.
Cloudflare is a content delivery network (CDN) and distributed domain name server service that provides a range of services to improve the performance, security, and reliability of websites.
Deploying a static site to Cloudflare is one of the easiest way to get your application out there. It is free, fast and easy to set up.
To deploy your nuxt app to Cloudflare, you need to create a new page on Cloudflare. You can do this by logging into your Cloudflare account and clicking on the "Workers and Pages" on the sidebar
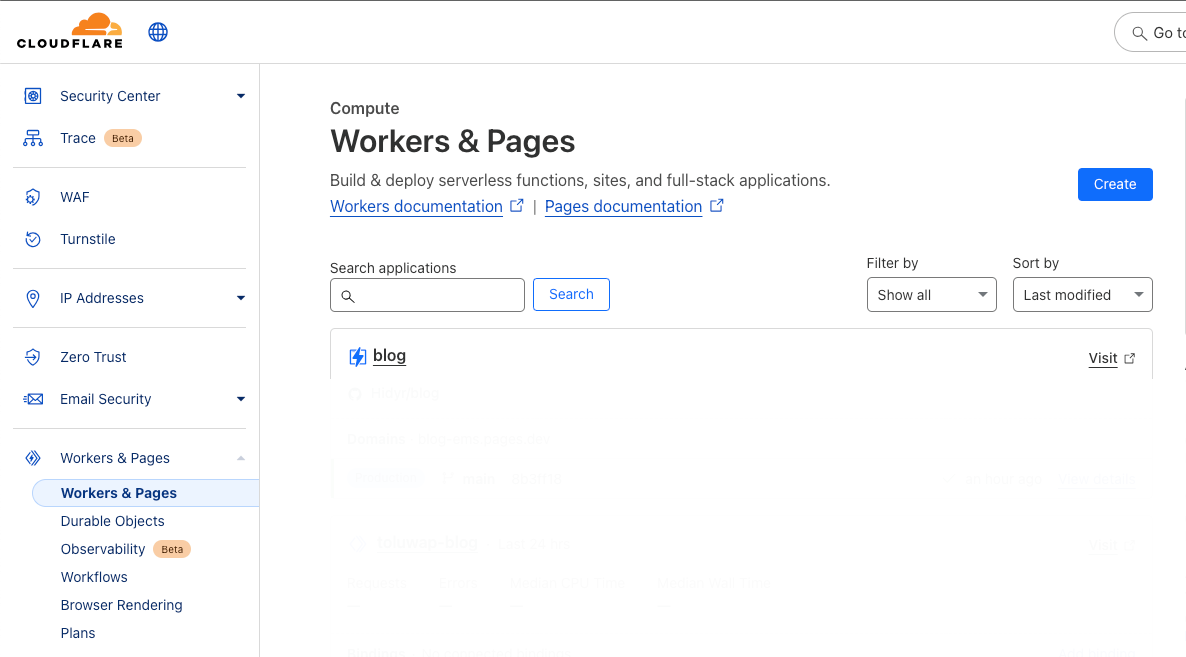
Click on the "Create" button and select "Pages".
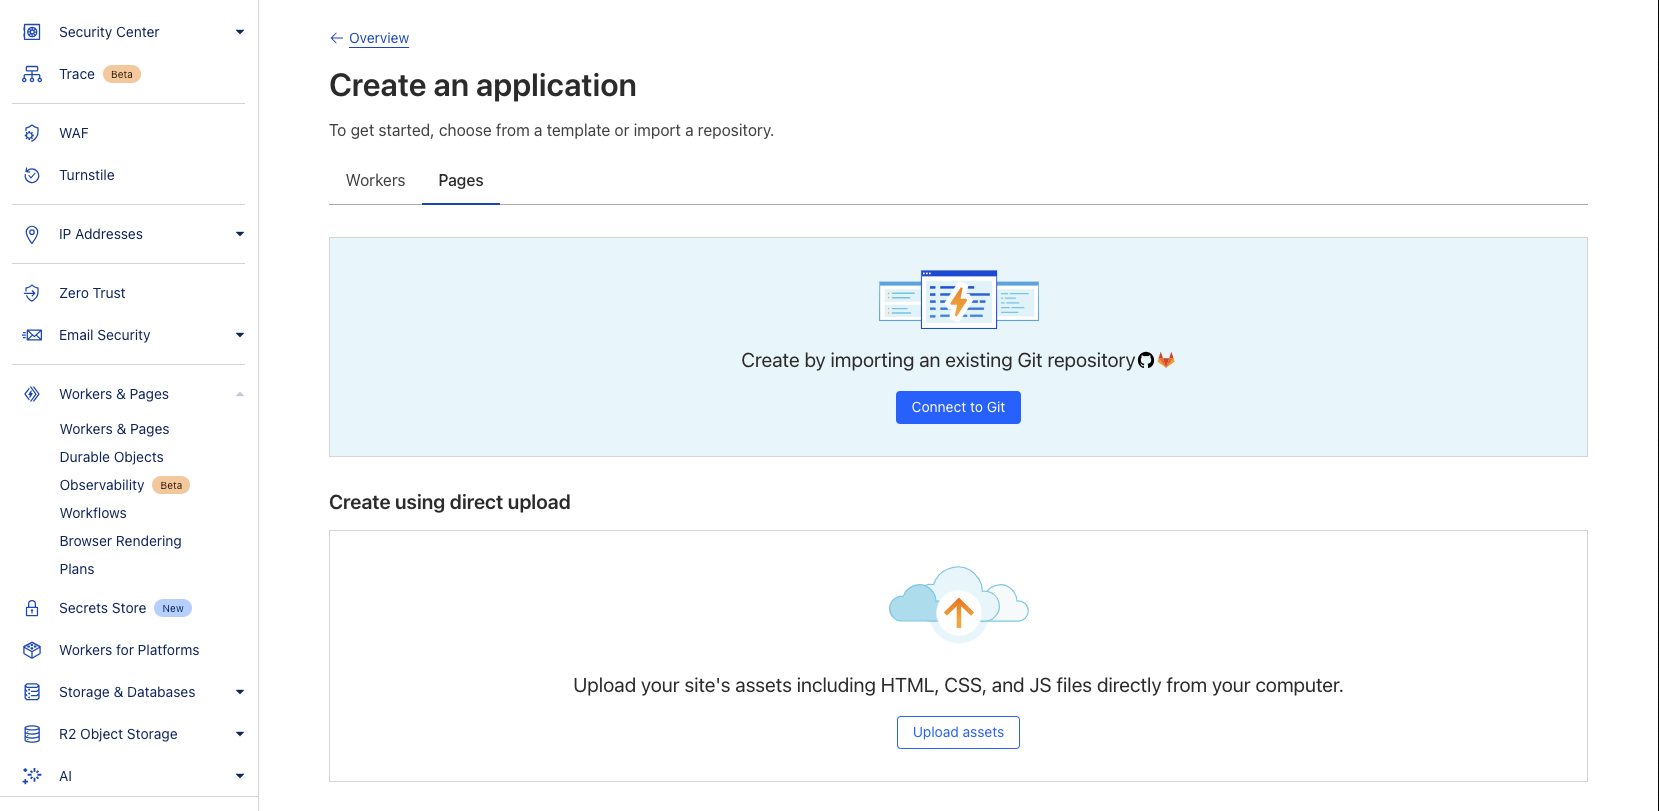
Next, you will be prompted to connect your Github account. Click on the "Connect to GitHub" button and follow the prompt to authorize Cloudflare to access your Github account.
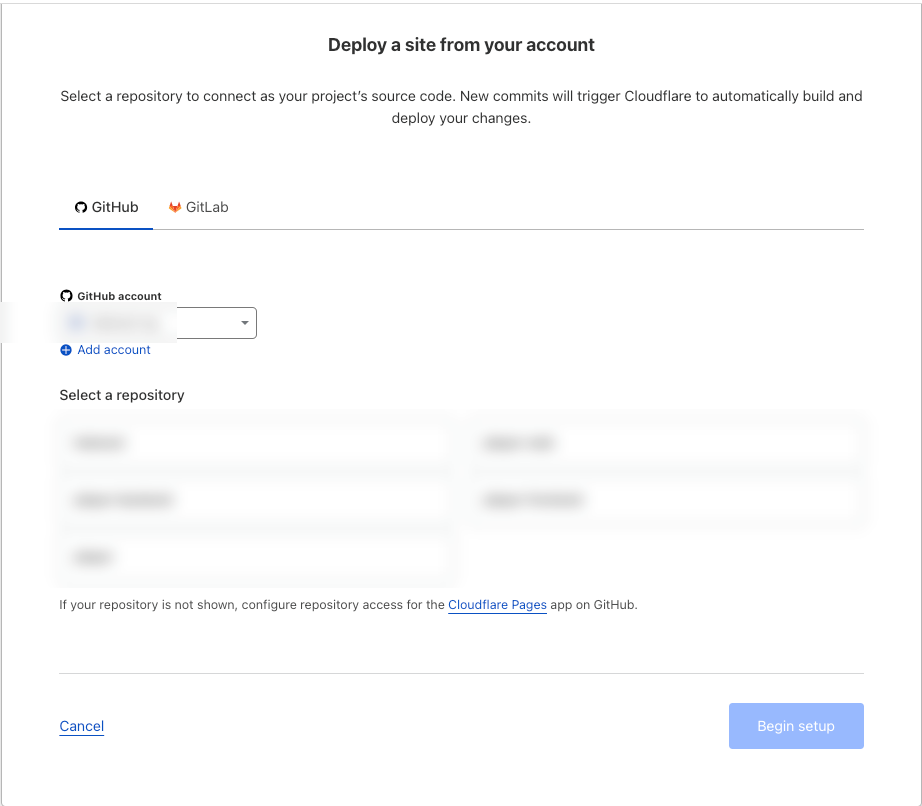
Once you have authorized Cloudflare, you will be redirected to the "Create a new page" page. Here, you will need to select the repository that contains your nuxt app.
Once you have selected the repository, you will be prompted to select the branch that you want to deploy. Select the branch that contains your nuxt app and click on the "Next" button.
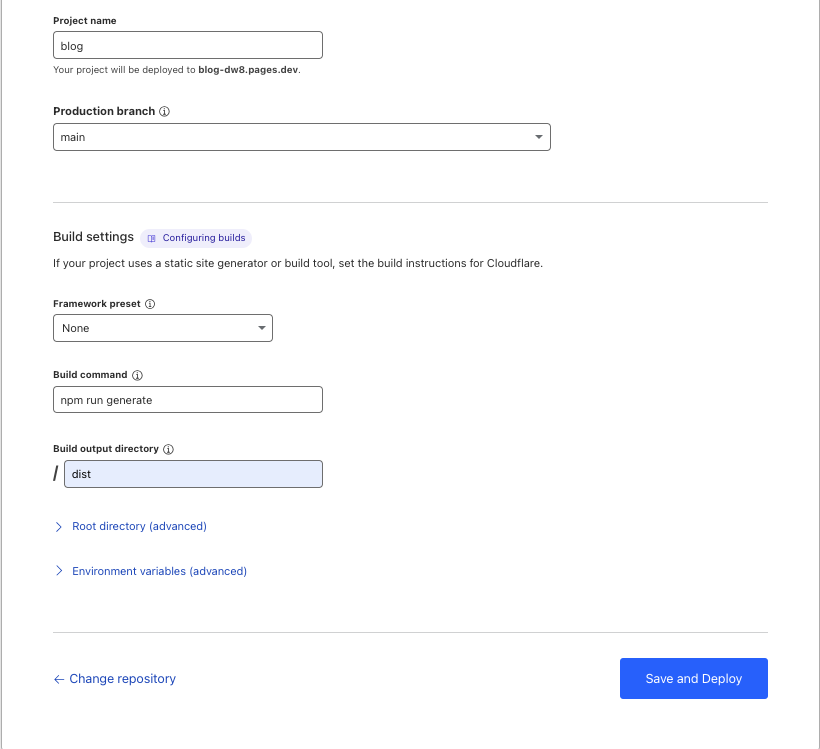
Next, you will be prompted to select the build settings for your nuxt app.
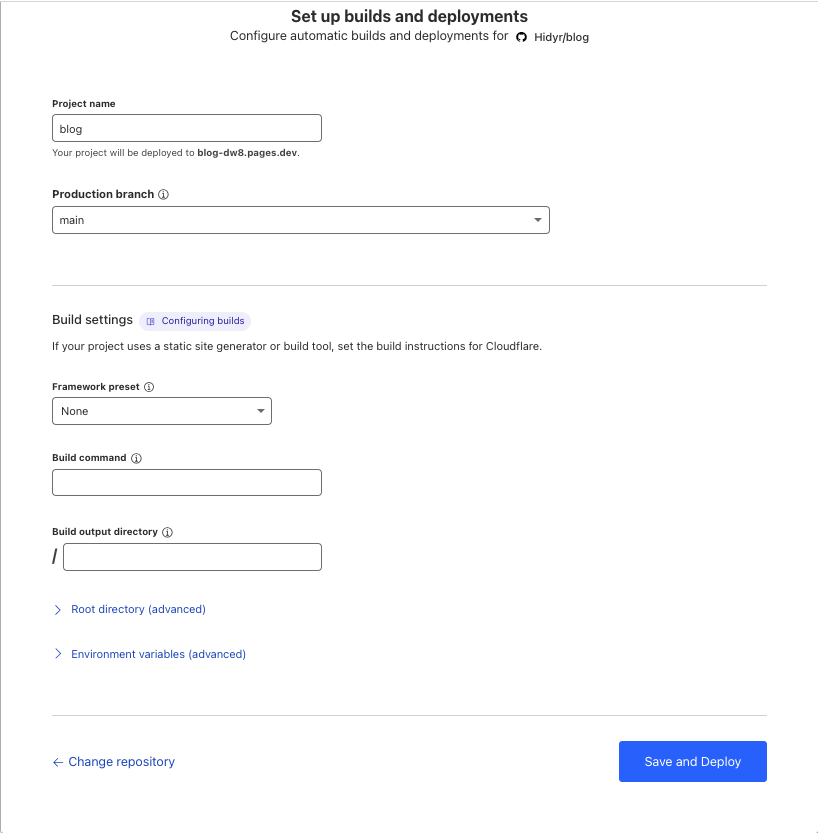
Here, you will fill in as below, your configuration might be different if you are using a different stack or framework
Click on the "Save and Deploy" button to start the deployment process.
Once the deployment is complete, you will be redirected to the "Deployment" page where you can see the status of your deployment.
Click on the "Preview" button to see your nuxt app in action.
Now you can create and deploy your application without hosting stress.
Cloudflare allows you to add your custom domain, SSL and DDos protection to secure from abuse and many more.